Bolex H16 User
For Practical Bolex H16 Filming
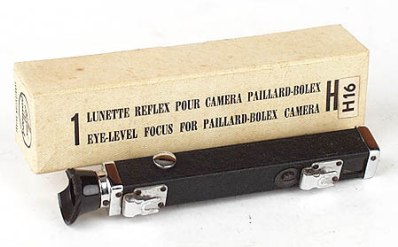
Eye Level Focusser
Bolex Product Code :- REFSE
 This
accessory was designed for Non reflex cameras which had the Critical
Focusing Screen already installed. It enables the camera operator
to see the image generated by the Critical focusing screen at the rear
of the camera instead of from the inconvenient top position.
This means that you can focus accurately by bringing the required lens into the top lens position in front of the critical focusing screen, and focus from the rear of the camera.
Apart from this advantage the eye-level focusing attachment reproduces the exact frame of view given by the lens, whereas the critical focusing screen when used alone, makes a circular image that cuts off the corners of the frame.
 With
an eye-level focusing attachment on your camera you will make full use
of the critical focusing screen
and will find it particularly useful when you use telephoto lenses or
fast lenses at full aperture.
You can also use the focusing screen to keep a check on the depth of field obtained with any lens.
But remember that even though the image is magnified ten times it is still very small compared with the size of the projected picture.
The apparent sharpness of objects near the limits of the depth of field zone may be deceptive when viewed on the focusing screen.
The eye-level focusing attachment can be used on all H16 and H8 Non Reflex cameras with the critical focusing screen already installed and is fitted to both in the same way.
Earlier cameras are fitted with clamps designed to hold the tri-focal viewfinder.
This viewfinder should be placed in the side position (on the camera door) and the tri-focal clamps removed by unscrewing them. These clamps should be replaced by the two special mountings supplied with the eye-level focusing attachment. Later cameras had the special mountings already fitted and will not require any adjustment.
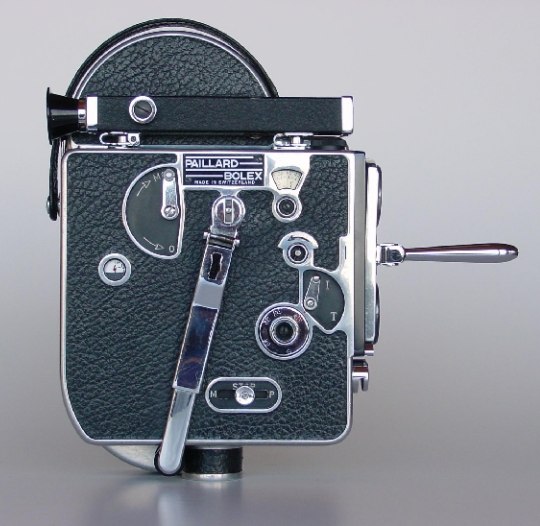
The eye-level focusing attachment is provided with three adjusting screws that will correct the image if it appears off-centre or incomplete. These are found under the metal cap at the forward end of the barrel. Vertical adjustments can be made by turning the upper of the three screws. For horizontal adjustments turn either of the lower crews. The Photograph on the left shows the Eye Level focusser attached to the top of a H16 camera.
Remember that a Bolex camera with an Eye Level Focusser although very similar looking to a Reflex camera is however NOT! The differences are admittedly slight but are noticeable. Lookout for a viewfinder that is raised off the top body of the camera on two small pillars. If this is the case it is not a viewfinder at all but an eye level focusser so therefore a Non Reflex camera.
Instruction for Using the Eye Level Focusing Attachment
1 Unscrew the magnifying lens of the critical focusing screen. This is situated in the upper front part of the camera body. Then replace it with the special cover glass supplied with the accessory. 2 Slide the eye-level focusing attachment on to the mountings so that the aperture in the bottom at the front of the instrument covers the magnifying lens of the critical focusing screen. 3 Unscrew the dust cap from the front of the critical focusing screen, as for normal use.
 4
Before placing a lens in front of the critical focusing screen, adjust
the eye-level focusing attachment to suit your eyesight. Turn the milled
knob on the side of the tube until the grain of the ground glass surface
of the prism is seen in sharp focus when the camera is pointed towards
the light. This adjustment remains constant whatever the lens in use.
It need only be altered if the operator's eyesight changes.
5 The attachment is now ready for use. Screw a lens into the turret and swing it in front of the critical focusing screen, open the lens aperture to its maximum stop and bring the subject into sharp focus by rotating the focusing ring on the lens.
![]() 6
Return the turret to bring the lens into the operating position and set
the aperture for filming. The picture right shows the difference between
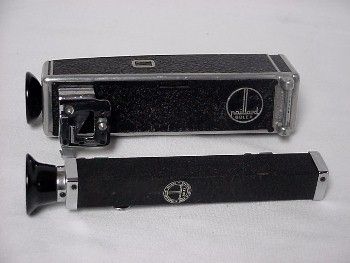
a Bolex Viewfinder top and a Bolex Eye level focusser bottom.
6
Return the turret to bring the lens into the operating position and set
the aperture for filming. The picture right shows the difference between
a Bolex Viewfinder top and a Bolex Eye level focusser bottom.