Bolex H16 User
For Practical Bolex H16 Filming
Tips to Improve your Images:-
Avoid the possibility of Prism Flare occurring
 OK so everyone knows what a lens flare is and what it looks like, hopefully the nice kind where you get a series of circles or hexagons going off into the distance.
Personally I'm getting more and more fed up of seeing their appearance in Films and TV. Have you got nothing better than a lens flare to capture? Anyway with Bolex cameras you can get another kind of flare 'Prism Flare' and this never, ever looks pretty and just looks weird and to be avoided at all costs.
In all honesty it shouldn't happen to you very often and isn't a major problem to avoid by making sure while shooting your looking out for the combination of factors that cause it:-
Sun bright and out directly above you + Wide Angle lens or forgot lens shade + Point camera slightly or fully up at the sun = Prism Flare.
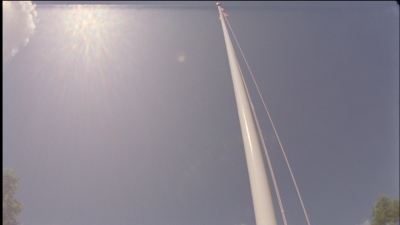
 It may be quiet difficult to spot it occurring in your viewfinder when it does happen. The example above was obtained using a Peleng Fish Eye lens that has no lens shade and that I stupidly didn't shade using a matte box. I tracked up this flagpole from the base to the top where the sun starts a small lens flare followed by a horrible prism flare at the top. Its better to look at the two larger linked images where you'll see the effect much clearer.
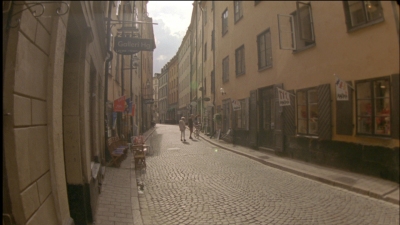
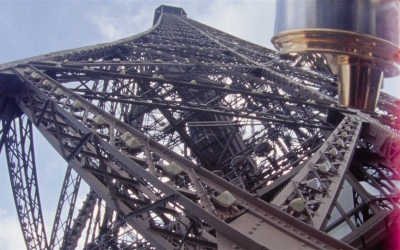
Second example is more subtle but now you know what to look for it's easier to see it. In this example you can see two small lens flares there is a gap from the top frame line then the rest of the image in a rectangle shape appears washed out and brighter than what was directly below the top frame line.
 Change from a Foggy to a clear outlook with use of a Changing Bag
There is a reason why films state on their boxes and cans "Load in Total Darkness". If you don't shade your spools at all when loading or do a poor job the start of your films will be fogged. Anyone new to film photography general loves there organic mistakes and fogging the start of a roll of film or taking the camera door off while shooting will get you the 'fog effect'. Interesting to look at and fun to begin with, kind of amateurish if you keep doing it.
Almost as annoying for me than lens flare is the seeing of pointless unartistic fogging of film but the worse kind is Edge Fogging. You'll probably only see Edge fogging on screen with Super 16mm material to be honest for reasons that will be fairly obvious looking at the picture shown left. There is edge fogging both sides of the film if you look closely but the fogging on the left isn't as extreme as the kind happening on the right. If it had of been the other way round and happened on the left side it could have gone further into the film fogging just the sprocket hole area leaving the picture area alone but sods law it didnt!
 What causes edge fogging is a shaft of light travelling down the internal sides of a 100ft roll of film prior to or during the time when it is being loaded. The 100ft camera spools are usually 17 or 18mm wide not exactly 16mm and so will have a 1-2mm gap depending on manufacturing tolerances which means the film isn't flush both sides with the sides of the spool.
Because of that it may also have some weave when sat wound on the 100ft spool I.E the first layer wrapped round it may not sit directly on the next and so on. It only takes one shaft of light to traverse that crack touching and therefore exposing the edge of the film all the way down to the center of the spool. The best way to avoid this is to take your changing bag with you everywhere and load every film in it. You'll only wonder if it was your fault or the labs! If you use a changing bag you'll know who!
Tips to improve your Camera / Film Handling
Don't use the internal film cutter unless you have to!
In the manual it states when Loading the camera to cut off a bit of film at the start of every spool or core your about to load into it. I thought this was a crucial step for the camera to be able to successfully load itself, it must need film with a diagonal edge to be able to do so, so I cut the start of every spool for about 5 years.
That was until i was out and about filming and tried to load some Hawkeye surveillance film for the first time which had an extremely strong triacetate base. The cutter just couldn't cut it. In the end i gave up on cutting it as i had completely butchered the start of the film on that spool and it was never going to load now until i cut out the crumpled start with a proper pair of scissors some other time.
 But I needed to shoot at an event that day so I took the next spool of the same stock made on the same tough base peeled back the sticker holding the film tight on its spool and fed it into the auto threader hoping it would work without cutting it.
To my surprise it threaded the film just fine. I have subsequently found all Kodak stocks are all cleanly cut off the master roll at the factory and the sticky tape they use to stick the end of the film down on each spool pulls off extremely cleanly each time without leaving any sticky residue at all. So I've never bothered since.
This saves extra hassle and time loading and fiddling around making sure you haven't misplaced the cut end in the camera chamber with the potential for it to get somewhere it shouldn't as a foreign object or that you might spend ages trying to locate in your changing bag afterwards. So only use the film cutter if the film is not accepted by the camera.
Don't wind the film on to the 0ft start mark after loading and closing the camera door.
This is really pointless when you think about it and wastes precious film into the bargain that you could be using to actually capture images on. I've been told by various 'film people' the reason for this being in the instruction manual is so that there is enough unexposed film for when the film is about to be processed at a lab for a lab technician to splice the start of a roll onto a master reel along with lots of other rolls before they all eventually go through the film bath. The splicing action may introduce dust and finger marks to the film as rolls are spliced together and by winding on and only shooting after the 0ft mark is reached there is a gap of unexposed film between the physical start of the roll and picture start keeping any dust or muck away from the picture area.
But what happens when you Finnish shooting a roll? You let the roll run out while still shooting don't you? (I know I do). There isn't another mark to look out for to tell you to stop shooting unless you pick an arbitrary one say 95ft. I suppose you could when that's reached put the lens cap on the lens and set the camera running until the end of the roll is reached thereby leaving a similar length of unexposed film and a gap between picture end and the physical end of the roll. But who does that? It certainly isn't recommended in any camera manuals and no history has developed of anyone doing this with cine cameras.
So the picture start of the reel if following the instruction manual will be away from the physical splice and any dust and muck that may arise at the physical splice point. While the end of the roll will be the complete opposite and the very last frame will have exposed images on it and be directly at the splice point and have potential for muck and dust over those picture frames around the splice.
Now the lab i use isn't that bad and any muck or dust has gone after only a few seconds runtime so i choose to load the camera in the shortest amount of film i can and close the door and not wind on to the 0ft mark. If your finishing digitally you can usually clean up the mucky section of frames around the join using Photoshop to retouch dust or muck out of those frames. There will always be a little bit of unexposed film at the start just in the process of lacing the camera up (if you do it in a changing bag) as compared to the end anyway.
If you do happen to be on scene with a new role of film and something incredible is about to happen in front of you then by all means wind on to be sure of a clean start but you certainly don't need to go as far as 0ft before you start picture taking and i personally wouldn't bother at all.
How to swap from one 100ft spool of film stock to another mid roll
You'd think there would be more things i could find annoying about shooting film but having worked out and resolved by trial and error all my previous problems and hi cups with neat solutions along the way this is actually the only issue left that I still find frustrates me. With digital cameras you just flip a menu option and choose a different ISO film speed but with film cameras you have to physically swap one film stock for another. The problem is that you might not be physically ready to easily swap having only used up half of your spool yet you still need to do so.
There are two reasons that I find myself needing to swap stocks 1) I mainly shoot outside under natural daylight where conditions change and you suddenly find yourself on the edge of being able to film with one stock and needing to jump to a higher speed stock 2) I film my professional long term film projects on negative film but like to shoot family and friends and holidays on reversal stock so as to be able to project it. This often leaves me going out for the day reaching for the film camera and finding a stock I don't want to use inside it or when on a shoot wanting to swap.
Now according to the Instruction manual you can remove a half finished film from the camera by use of the back wind handle which reverses the film directly back onto its original spool. By making note of the footage counter or frame counter you should (in theory) be able to locate the exact frame and start again later from where you left off.
When you think about this one there really is no way you’re going to accurately hit your mark and you'll end up superimposing one shot over another for a bit or waste film by leaving an unexposed gap. The reason why being due to the fact that you will never load the camera exactly the same each time so the frame your starting from will never be the same each time. Its never going to be as easy as loading a 35mm film cartridge. There are 4 thousand frames on a 100ft roll of 16mm film so there is no way you can reload back to the exact frame every time. Or is there?
What I've ruled out as an alternative:-
I don't want multiple 400ft magazines each loaded with different film stocks as the weight of kit increases dramatically when you’re moving magazines, motors and batteries around. I also don't want to shoot entirely with one highly rated stock for all conditions such as Kodak 500T like a lot of DP's do to alleviate the problem because that means in good lighting I’d have to use lots of ND filtration to stop things being over exposed. As you should know with Bolex cameras its best to match the stock with the shooting conditions you face as having to use unnecessary ND filters means a darker viewfinder to frame shots via and therefore a lot of removing filters to compose a shot and adding them back to take a shot which will slowly sap your creativity!
So what led me to a way to achieve this was trying a really stupid idea that was suggested as a solution in the past which got me thinking of a better one while trying it. Here's the stupid idea :- Take the lens off the camera move the filter holder to one side and then move the prism away from the gate and then make sure the I / T switch is set to T and push the front shutter release forward and hold it, thereby revealing the film in the gate and then with a pen mark the frame with an X. Nice idea I suppose but again same problem when you try and find that particular frame later. You'll end up erasing multiple frames due to overexposure looking for where the X frame is supposed to be and nothings worse looking though rough shot footage than encountering lots of white outs also your liable to get dust on the prism doing it.
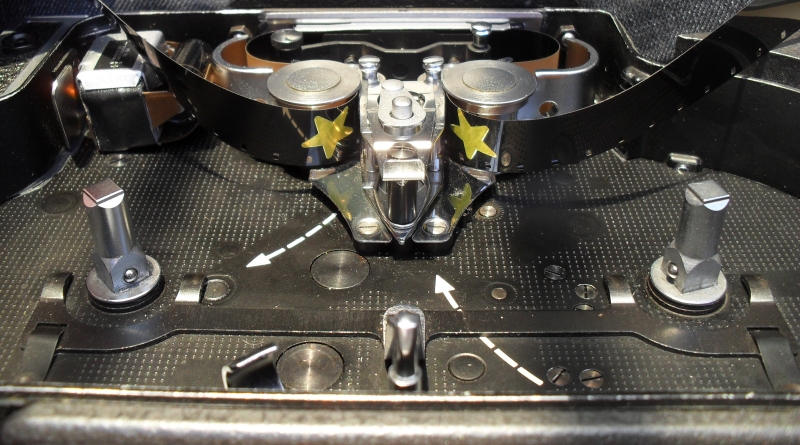
So what can you do? Luckily having took my advice on owning a changing bag your half way there as the only practical way I've found of swapping 100ft spools mid spool is:- First get yourself some small stickers. I find star shapes are the best, the kind your teacher at Primary school may have stuck on your work if you got Gold Stars as the shapes distinct and easy to feel for as you will be feeling for it later!
Take a glance at the footage counter and make a note on the empty film box as to where in the roll you are. Put your wound camera and pack of stars and your hands into the changing bag. Take the back off the camera and peel back one of your stars and by hand in the dark stick one star on the film about to enter and one on the film about to exit the camera mechanism on the shiny smooth film backing side at the points shown making sure the sticker doesn't stick over the sprocket holes or on anything else. You will probably have to use the spool ejector to take a spool out of its spindle to place your stickers and you may have to practice this blindfold a few times. You can now put the camera door back on the camera and take the camera out of the changing bag.
Now you have a choice! If you're only say 10 - 20ft into your spool then you might as well use the back wind handle as not much effort will be required to rewind the film back onto its spool and put back in its box and the film will be the right way round to shoot with later. If you've used over 60ft then there's a lot more film to tediously sit rewinding with the small back wind handle and you may be in a rush to swap stocks before missing something. So you could with the lens cap on the lens press the camera release button as if you were filming to get you quickly to the end of the roll. The film will be the wrong way round and now unload able into the camera later if unloading it this way so you'll need at some point later in a charging bag use some film re winders and spool this 100ft spool onto another 100ft spool to get it the right way round to enter the camera again (B Winding).
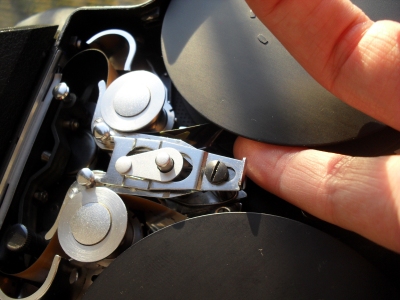 So when you do eventually come later on to reload and use the unexposed area on the half shot spool without reshooting over what's already been shot on the first half you'll use a changing bag again to load the spool into the camera and close the camera door as normal.
Take the camera out the bag and with a lens cap on the lens get the footage counter 10ft before the footage count you reached before shooting ended on this stock last. Now set the camera to 12fps and put it back into the changing back take the camera door off and place your finger as shown over the exit of the film from the top spool.
Don't be worried about your hand touching this side of the film so long as your fingers aren't greasy you will not damage the film or picture area. This side of the film is the REM JET blanking area and protects the back of the film and is removed when it goes through the chemical bath anyway.
You will eventually feel the first star come by the tips of your finger, when you do you can then swap to single frame and push the front release 1 frame at a time forward a number of times until you feel the star come out the bottom and then you should feel the 2nd star should be off the top roll and both stars should be where they were when you finished with this roll last and the gate will be exactly over the first frame of unexposed film ready to shoot. You can either peel of the stars or leave them on they seem to get obliterated going through the RemJet removal stage at the lab and won't make it to the photographic chemical development stage of the bath.
Number the boxes or rolls your shooting after you've shot them in sequence.
The reason for this tip is so that you get your footage back in order. Last time I went to my lab I dropped off 14 x 100ft boxes of negative film. When I got the footage back it was joined together as a 1400ft section on a core and naturally as I hadn't labelled as I shot the footage was all over the place rather than progressing logically from 1st days shooting to the end. Also make sure that the start of the 1st roll is representative of the best exposure of the rest of what you've shot. I managed on one roll to set the light meter wrong for the stock i was shooting and only realised my mistake half way through shooting with the resulting footage underexposed.
Naturally that was the first roll lacedup on the unattended telecine session so they naturally brought up the brightness to get a good picture out of it and then captured all the rest that was properly exposed and naturally all of that was too bright. Probably best to take a picture of a gray card on your 1st roll as well.
Don't tape down the camera door
![]() I hope this is self explanatory but there is no reason to tape down the Bolex cameras film chamber door unless you know yours to be bent and not attach correctly. Even if you feel a bit of give or movement when picking the camera out of its bag when the weight of the camera is resting on its back when you pull it out there is a light trap all around the edge of the the film chamber and camera door to stop any lights leaks. This may be common practice on high end films but is overkill on the Bolex.
I hope this is self explanatory but there is no reason to tape down the Bolex cameras film chamber door unless you know yours to be bent and not attach correctly. Even if you feel a bit of give or movement when picking the camera out of its bag when the weight of the camera is resting on its back when you pull it out there is a light trap all around the edge of the the film chamber and camera door to stop any lights leaks. This may be common practice on high end films but is overkill on the Bolex.