Bolex H16 User
For Practical Bolex H16 Filming
Vario Switar POE & POE4
Bolex Product Codes:- For POE 'VAPOL' C Mount (POE4 VASEC), 'VABAL' Bayonet Mount (PO4 VASAB ), DEVAR & CAVAR Diaphragm pre selection cables for Mechical Handgrip and Power Handgrip Respectively, Close up attachments VALON & BOCOU for POE & BONET for POE4.
This is the most popular, the most well known & the most familiar Zoom lens that you will ever encounter for the Bolex H16 camera system. There were two versions the original POE and the POE4 which had some slightly improved optics and light metering over its predesessor.
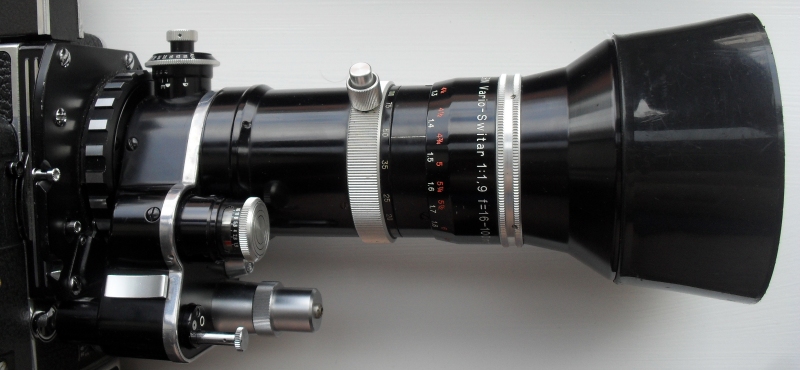
| Vario Switar 100 POE f1.9 16-100mm Data Table | |
| Front Filter size | Holds 1 Series 9 filter |
| Horizontal Field of View | 34° |
| Relative Magnification | 0.4x |
| Focusing Range | 1.6m POE / 1.2m POE4 to Infinity |
| Lens Hood | Comes as Standard |
| Year of Introduction & Discontinuation | 1970-1980s |
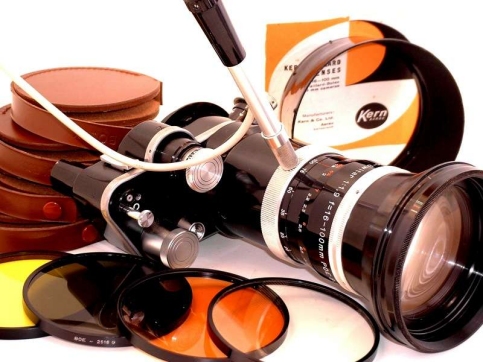 This is the most popular, the most well known and most familiar Zoom lens that you will ever encounter for the Bolex H16 camera system.
Its often found bundled with a Bolex camera but it seems to be almost universally found with the EBM, SBM & EL models where you will frequently see it proudly attached to a camera sold as a package in its original metal camera case.
It does bulk the camera up somewhat weight wise but this lens does look and mean business.
Its always very easy to source if required and thankfully doesn't seem to have found any fans in the Digital camera realm probably due to its size, so goes for reasonable prices second hand.
The lens was produced for Bolex by the famous Optics factory Kern and is available for both Bolex Bayonet & C Mount.
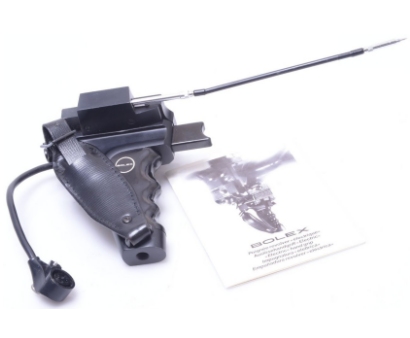 Of the four big zoom lenses produced exclusively for Bolex cameras this is the one you'll most regularly see as it was produced in the hundreds of thousands and because of its success is quiet common. Its made of a very solid construction and has the advantage of an in built light meter, that can be set to a variety of film speeds, all available fps rates and variable shutter positions. Lesser well known is its ability to integrate into both the Mechanical Handgrip and Power Handgrip design to provide easier operation.
One of the minor annoyances with the Reflex Bolex design is the prism which lowers the total amount of light available to the viewfinder. With a zoom lens with an accurate exposure meter automatically responding to light if you happen to be shooting in brilliant sunlight + using high speed film the lens will naturally stop down to compensate and you will have a very dark viewfinder image. This isn't great when framing a shot before you want to take it. It's this anomaly that the two hand grips and this lens try to rectify by using two versions of a special cable called the "Diaphragm Pre-Selection Cable".
If you use the Bolex Mechanical Pistol Grip and the POE lens there is a traditional mechanical cable release which screws into both. On the lens there is a front facing screw thread to attach one end of the cable to, the other end screws into the arm of the grip that slides back and forth and makes contact with the camera's side release. You may not have noticed the screw thread in the side of it before but this is what its purpose is for. There are also a number of switch able positions inside the grip to make the slide of the grip longer or shorter. Make sure that the black dot on the silver plunger on the front of the lens is turned clockwise to face right then the lens functions as described below.
1 Plunger not pressed in at all and the lens is left in a neutral state not metering.
2 Plunger pressed in to first click stop. The lens’s built in light meter is turned on and starts auto adjusting the diaphragm to the light.
3 Plunger pressed in to 2nd click stop diaphragm is fully opened to allow operator to see fully the scene and focus under maximum lighting.
4 Plunger pressed in to 3rd click stop. After focussing correctly under the best conditions above the lens returns to state 2 for filming.
5 Pressing the plunger further makes it make contact with the front camera release and the camera starts running.
So with this method you can start the camera running and control the diaphragm from the same place leaving your other hand free to operate the Power zoom. Also you can never over expose by mistake. If the black dot on the silver plunger on the front of the lens is turned anti clockwise to face left then the plunger will travel the full distance as before but not click through any of the states above and will ultimately make contact with the cameras front release button to start the camera running when it reaches the end stop.
You can also set the camera running two more ways via the lens. One by pressing the silver plunger in manually or via attaching the supplied lens cable release that attaches to the lens to allow easy movement of zoom position and has a cable release you can attach as well. I'd only advise using either of these with a tripod.
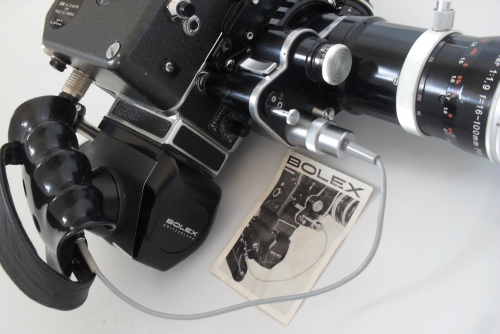 When used with the Power Handgrip the same functionality can be achieved but in this case electronically and without clicking through so many state changes. There is a small cable plus a new bell shaped battery cover supplied together in a plastic bag called CAVAR.
By replacing the forward facing battery compartment battery cover with a bell shaped one which now has a mono jack plug socket attached a cable can be strung between the handgrip and the lens.
By pressing a button on the Power Handgrip you can now electronically open the Iris fully whenever you need letting the maximum light in again for pre scene composition let it go and then press the other button on the grip to start filming with an attached motor.
Although this was available on the earlier zoom lenses in the 86 range mechanically you cannot achieve this electrically as well. Its the only lens that works with both methods and shows how much this lens was designed around the H16. Most of the time the instructions to achieve this are lost and it isn't widely know that this functionality exists. I'm including it here to publicize it more.
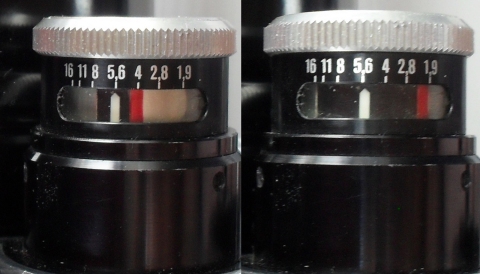 Another good aspect of this lens is that you can bracket for exposure as shown left. The exposure range takes on the black bar between 8 and 4 while on the right the exposure can go over the entire length of f stops.
The most practical application for this i find is time lapse photography where the sun can dazzle through the lens at one point coming through a cloud and next moment not and the you may want to limit the range the lens can fluctuate through.
This feature isn't available on the PTL lens despite it having a similar way of swapping from manual to automatic exposure using the very same kind of f stop exposure contol.
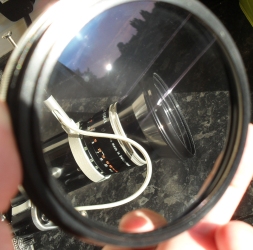 The POE lens has two close up lenses available which screw into the front screw thread the 1st offering the range 0.9m to 1.6m and the 2nd 0.7m - 0.9m. There is only one for the POE4 which offers the range 0.7-1.1m. The lens comes with a retaining ring to hold 1 series 9 filter. The POE4 version of the lens offers high film speed sensitivtity now 400ASA up from the POE's 200ASA.
The optics of this lens are good enough to be used as the main lens in the optical printers manufactured by JK Optical Printers and he takes the original version and repuroses them into what he needs minus the auto exposure section.
![]() TheLens does cover the Super 16mm area with some caveats see the Super 16mm Lens Advice section. The lens takes 2 batteries for automatic control of the zoom and 1 for the light meter.
TheLens does cover the Super 16mm area with some caveats see the Super 16mm Lens Advice section. The lens takes 2 batteries for automatic control of the zoom and 1 for the light meter.